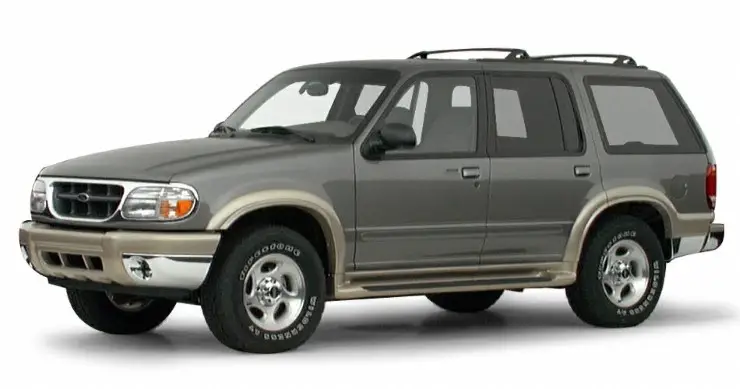
1995 - 2001 explorer 4.0L Torque Specs
2001 explorer Front End Torque Specs
Click the area you are looking for!
Ford Explorer 4.0L Repair Information
Ford Explorer 4.0L Engine Repair Information
Here you can find information regarding the assembly of the Ford Explorer front end. In this guide we will cover the essential repairs for the front end of this vehicle. Included within these repairs is the inner and outer tie rod removal and change, the front wheel hubs installation, ball joint removal and installation, the upper and lower control arms, and the front shock installation. Along with the repair procedures we also include the corresponding bolt torque specs for each fastener involved. These guides are intended to assist in each procedure to help diyers with the job.
Ford Explorer Tie Rod Change/Removal
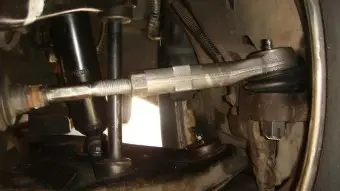
To install a new tie rod on a Ford Explorer you must first remove the old one from the vehicle. This can be done by raising the vehicle up by either the use of a floor jack or a vehicle hoist. Once the vehicle is in the air you can remove the corresponding tire for the side that you want to change the tie rod on. Once the tire is off you can now access the old tie rod and remove it for replacement. The outer part of the tie rod uses a nut that will need to be removed, this nut may spin with the rest of the tie rod depending on how rusty it is. I suggest using a pair of vice grips to hold the portion of the bolt to prevent it from spinning. You may also use a wire brush to clean off the threads prior to removal and or use penatrating oil to aid in removal of the nut. Once removed you can now tap out the tie rod from the spindle and start to remove it completely. If you want to replace just the outer portion of the tie rod you can remove the clamp bolts further down the tie rod and remove the outer portion of the rod and replace. Once the outer tie rod is off you can now install the new part and reinstall it the same way it had been removed. Once you get the nut back in place you can torque it to 52 ft-lbs.
Ford Explorer Outer Tie Rod Nut52 ft-lbs
Ford Explorer Inner Tie Rod60 ft-lbs
Ford Explorer Tie Rod Locking Nuts30 ft-lbs
Front Wheel Hub Installation
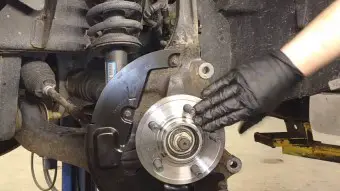
To install the new wheel hub you must first remove the old hub from the vehicle. To do this you must first jack up the vehicle and remove the lugnuts from the side of the vehicle that you want to replace the part on. Once the tire is off you will need to remove the bolts from the brake bracket on the steering knuckle. These bolts will be rather tight so you may want to use an impact or find some leverage. Once removed you can move the brake assembly out of the way and move the brake rotor from the vehicle. Now you will have access to the wheel hub bolts from the rear of the part. The best way to remove these is to move the steering wheel one way and then the other to allow yourself more room to access each bolt. Once the four bolts are removed the hub should be able to move out of the vehicle. You may need to use some penetrating oil to assist in the removal as occasionally corrosion builds up and causes it to become stuck. Once the hub has been removed you can install the new hub in reverse order from which it had been removed. Start by placing the hub into the knuckle and then fastening the 3 bolts into it from the back. Once in place these bolts will need to be torqued to 83 ft-lbs. The next step is to reinstall the brake rotor and bracket. The bracket bolts torque to 100 ft-lbs. With the axle shaft back in place and the braking system tightened down you can torque the axle nut down to 184 ft-lbs. Now with everything back in place you can install your tire and torque your lugnuts to 100 ft-lbs.
Ford Explorer Front Wheel Hub83 ft-lbs
Ford Explorer Lugnuts100 ft-lbs
Ford Explorer Front Axle Nut184 ft-lbs
Front Ball Joints Installation
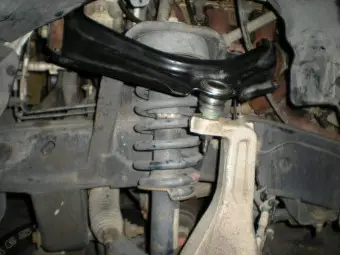
The Ford Explorer has two sets of front ball joints being the upper and lower ball joints. The most common one for replacement is the lower ball joint as it takes most of the vehciles weight. To replace the joints without replacing the knuckle you will need to press the old joints out and then press the new joints in. Once done the lower ball joint nut torques to 129 ft-lbs. The upper ball joint is similar to the lower but is easier to install. The upper ball joint nut can be torqued to 41 ft-lbs.
Ford Explorer Front Lower Ball Joint129 ft-lbs
Ford Explorer Front Upper Ball Joint41 ft-lbs
Front Shocks installation
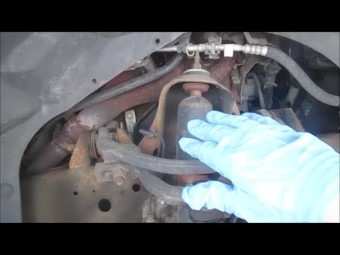
To replace the front shocks on a Ford Explorer you will first need to remove the upper mounting plate for the shock. This can be accessed from under the hood of the vehicle or by the side with a wrench. Once removed the next bolt to remove is the lower bolt that connects the shock to the axle. With this bolt removed you can now remove the shock from the vehicle. The new shock can then be moved back into the vehicle the same way the old one came out. Once the new shock is installed you can then start installing the bolt and nut. The upper mounting plate nuts that connect the plate to the vehicle frame can be torqued down to 22 ft-lbs. The M12 nut that connects the shock to the plate can be tightened to 41 ft-lbs. The lower portion of the shock absorber where it connects to the lower control arm can be tightened to 258 ft-lbs. This is a large bolt and nut and can be installed using some red loctite or blue depending what you have available.
Ford Explorer Shock Upper Mounting to Frame22 ft-lbs
Ford Explorer Shock Upper Mounting to Shock41 ft-lbs
Ford Explorer Front Shock Lower Bolt258 ft-lbs
Control Arm Installation
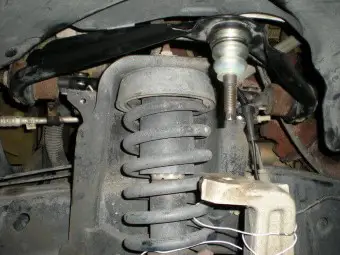
The Ford Explorer front suspension uses a series of control arms to connect the steering knuckle to the vehicle frame. These control arms connect via ball joints that are covered in a different portion of this web page. The control arms consist of 2 different arms that are distinguishable by the names upper and lower. The upper control arm connects to the frame in 2 locations using the same torque spec of 111 ft-lbs to do so. The lower arm connects to the frame using a couple different methods of fastening. First off it has a flag bolt and nut that connects it to the frame. This bolt/nut combo can be tightened to 295 ft-lbs. The second connection is a rearward attachment via a nut. This nut can be tightened to 111 ft-lbs.
Ford Explorer Upper Control Arm to Frame111 ft-lbs
Ford Explorer Lower Control Arm Flag Bolt295 ft-lbs
Ford Explorer Lower Control Arm Nut111 ft-lbs
Stabilizer Bar Installation
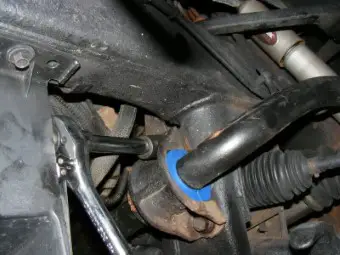
The Ford Explorer has a stabilizer bar in the front end that helps with the control and handling of the vehicle. This bar conects to two ends of the vehicle via nuts and then has 2 brackets one being on each side of the vehicle to hold the bar into place. The bracket bolts torque down to 52 ft-lbs while the endlinks tighten to 18 ft-lbs.
Ford Explorer Stabilizer Bar brackets52 ft-lbs
Ford Explorer Stabilizer Endlinks18 ft-lbs
| Front Steering Torque Specs | |
|---|---|
| Outer Tie Rod Nut Torque Spec | 52 ft-lbs |
| Inner Tie Rod Torque Spec | 60 ft-lbs |
| Tie Rod Connecting Nuts Torque Spec | 30 ft-lbs |
| Front Wheel Hub / Knuckle | |
| Wheel Hub Bolt Torque Specs | 83 ft-lbs |
| Brake Caliper Bracket Torque Spec | 100 ft-lbs |
| Wheel Axle Nut Torque Spec | 184 ft-lbs |
| Wheel Lugnut Torque Spec | 100 ft-lbs |
| Front Control Arms and Ball Joints | |
| Upper Control Arm to Frame Torque Spec | 111 ft-lbs |
| Upper Ball Joint Torque Spec Torque Spec | 41 ft-lbs |
| Lower Control Arm to Frame Bolt Torque Spec | 295 ft-lbs |
| Lower Control Arm to Frame Nut Torque Spec | 111 ft-lbs |
| Lower ball Joint Torque Spec | 129 ft-lbs |
| Front Shocks Torque Spec | |
| Upper Shock Mounting Plate to Frame Torque Spec | 22 ft-lbs |
| Upper Shock Mounting Plate to Shock Torque Spec | 41 ft-lbs |
| Lower Shock Flag Bolt Torque Spec | 258 ft-lbs |
| Stabilizer Endlink Torque Spec | 18 ft-lbs |
| Stabilizer Bracket to Frame Torque Spec | 52 ft-lbs |